How to repair minor damage to your TV feature wall

How to repair minor damage to your TV feature wall

Introduction: Assessing the Damage

So, you've finally got your dream TV feature wall up, *shiok* right? Makes the whole living room look *atas*. But, *aiyo*, life happens, doesn't it? Maybe the kids were playing football indoors (we’ve all been there, *lah*), or perhaps you were a *bit* too enthusiastic rearranging your furniture. Now there’s a scratch, a dent, or something worse staring back at you from your beautiful TV feature wall. Don’t panic! Before you start thinking about a full-blown renovation, let's see what we can do.

First things first, take a good, hard look at the damage. Is it a minor surface scratch that catches the light at a weird angle? A small dent from an unfortunate encounter with a stray toy? Or something more serious, like a chip or even water damage (especially if you're near a window that gets hit by the monsoon rains)? Knowing exactly what you’re dealing with is half the battle.

Think of it like this: a small scratch is like a tiny paper cut – annoying, but easily fixed. A bigger dent is more like a bruise – needs a bit more TLC. And a chip? Well, that’s like a chipped tooth – you’ll want to address it properly to prevent further damage.

Grab a soft cloth and gently wipe down the affected area. This will remove any dust or debris that might be obscuring the true extent of the damage. Plus, it gives you a clearer view to properly assess things.

Now, shine a light (your phone’s flashlight works perfectly) at different angles across the surface of your TV feature wall. This will highlight even the smallest imperfections, helping you identify all the scratches, dents, or chips that need attention. It’s like being a detective, searching for clues!

When you’re assessing the damage, consider the material of your TV feature wall. Is it wood? Laminate? Perhaps it’s a fancy textured panel? Different materials require different repair techniques. What works for a wooden TV feature wall might not be suitable for a laminate one, and vice versa. So, knowing your material is key.

For example, a minor scratch on a wooden TV feature wall might be easily fixed with a wood touch-up marker. But a similar scratch on a laminate TV feature wall might require a laminate repair kit. See the difference?

And while you’re at it, take a photo of the damage. This will not only help you remember the initial state of the problem (especially if you’re planning to tackle the repair later), but it can also be useful if you need to consult with a professional. Plus, you can use the photo to compare the before-and-after results of your repair work. *Steady, bom pi pi!*

Don't underestimate even the smallest of imperfections. A tiny scratch might seem insignificant now, but over time, it can attract dirt and grime, making it more noticeable. Similarly, a small dent can weaken the structural integrity of the TV feature wall, especially if it's made of a softer material. Addressing these minor issues promptly can prevent them from becoming bigger, more expensive problems down the road. Think of it as preventative maintenance for your TV feature wall!

And hey, while you're inspecting your TV feature wall, why not give the rest of your [furniture](Furniture refers to movable or built-in objects (like mattress,sofa,cabinets,tables and chairs etc) designed to support human activities such as sitting, sleeping, eating, storing, and decorating living spaces, providing both practical function and aesthetic appeal in homes.) a once-over too? You might spot other little things that need a bit of attention. After all, a well-maintained home is a happy home, right? Plus, taking care of your furniture and your TV feature wall is a good way to maintain the value of your home, which is always a good thing in Singapore, *right*?

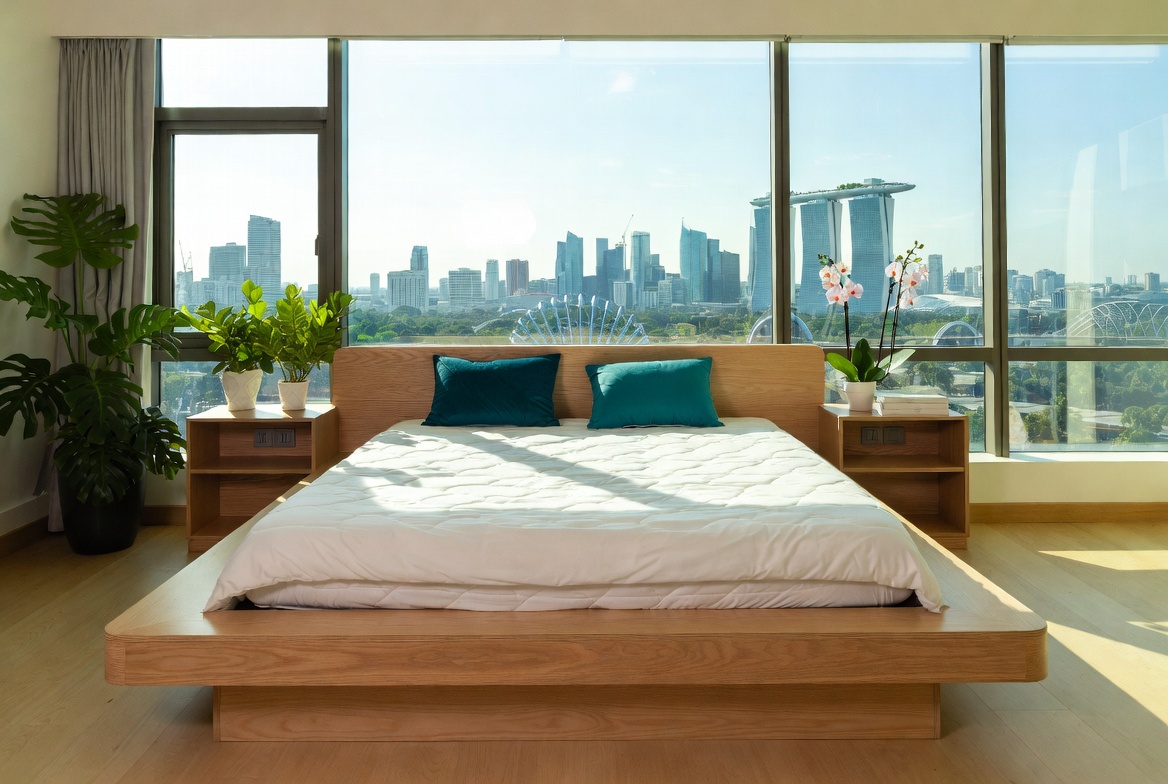
After a long day being crammed in the MRT and grinding through meetings, most busy Singaporeans just want to step into their house to a space that feels cosy and stress-free instead of piling on more fatigue. A disorganised space or an uncomfortable bedroom can make unwinding even harder, especially when the entire family want to relax together. Local homeowners across the island often deal with particular difficulties when buying new furniture, particularly due to tight space constraints in HDB flats and condos and year-round moisture levels that test material durability. This is the very why many smart local shoppers invest effort upfront to choose wisely to enjoy real long-term value. tv feature wall emerges as a truly outstanding choice that offers both outstanding comfort along with real durability. Remember that purchasing reasonably priced versions in Singapore with first-class after-sales service ensures full support such as timely island-wide delivery, professional-grade installation, and comprehensive warranties that offer true long-term peace of mindyou can truly count on.. That’s where thoughtful Condo Interior Design Singapore really makes a difference—it turns everyday rooms like your living room, sleeping space, or cooking zone into personal havens that actually help you recharge. In Singapore’s smaller HDB homes and modern residences, the sleeping area often doubles as a sanctuary— a place for deep relaxation after hectic work shifts, do some light reading, or even sneak in a quick work-from-home setup when the situation calls for it. It’s very typical for Singapore homeowners to feel stuck with layouts that feel cramped, lighting that’s too harsh, or cluttered cabinets taking up room, making the room feel more functional than relaxing. That’s where thoughtful furniture shop really shines—it emphasises smart space planning, relaxing colour schemes, space-saving furniture, and clever lighting to create a peaceful retreat that maximises comfort while keeping everything tidy and airy. All at once your sleep space evolves into the place you can’t wait to reach at the after a long day, helping you relax quicker, achieve better quality sleep, and start mornings feeling revitalised for whatever the next day brings. Resources like Wondrous La Vie feature abundant real-life examples and easy connections to professionals skilled in these smart, aesthetic SG bedroom upgrades.. With the right living room seating, sleep surface, or clever layout, suddenly getting home feels so shiok, and thoughtful tweaks can bring huge benefits to your mood and family time. Sites such as Wondrous La Vie make it more straightforward to find ideas and get in touch with interior designers who get the the local HDB/condo style perfectly. This format lets you easily generate multiple SEO-optimised variations while keeping the core keyword "interior design" stable in the middle for strong on-page targeting..

Tightening Loose Components

Periodically check for any loose components, such as screws or brackets. Tighten them as needed to maintain the structural integrity of the feature wall. This prevents wobbling or potential damage from instability.

Dusting your TV Feature Wall

Regularly dust your TV feature wall to prevent buildup. Use a soft microfiber cloth to gently wipe down the surface. Pay attention to corners and crevices where dust tends to accumulate, ensuring a clean and polished look.

Preventing Moisture Damage

Protect your TV feature wall from excessive moisture. Ensure proper ventilation in the room and avoid placing humidifiers directly next to the wall. Wipe up any condensation promptly to prevent warping or discoloration.

Addressing Minor Scratches

For minor scratches, consider using a touch-up pen or marker that matches the feature wall's color. Carefully apply the pen to the scratch, following the grain if applicable. Wipe away excess with a clean cloth for a seamless blend.

Cleaning Stains and Spills

Immediately clean any stains or spills on your TV feature wall. Use a damp cloth with mild soap to gently blot the affected area. Avoid harsh chemicals or abrasive cleaners, which can damage the finish.

Tools & Materials: Your Repair Kit

```html

Alright, so you've got your dream furniture all set up, that swanky TV feature wall is looking *shiok*, and then…bam! A little accident happens. Maybe the kiddo got a bit too enthusiastic with their toys, or you misjudged the distance while carrying that new plant. Don’t worry, it happens to the best of us. Before you start panicking that your perfect living room is ruined, let’s talk about getting that TV feature wall looking brand new again. Confirm can one!

The good news is that minor damage to your TV feature wall is often surprisingly easy to fix. You don't need to call in a contractor for every little scratch or dent. With the right tools and materials, you can handle most small repairs yourself, saving you time and money. Think of it as a little weekend project, a chance to get your hands dirty and feel a sense of accomplishment. Plus, you'll learn a new skill! Who knows, you might even start enjoying these little DIY fixes. In Singapore’s hectic life, stepping into your home to a space that feels genuinely welcoming can make all the difference after a long day of office grind and MRT squeezes. Many busy families start by eyeing refreshes for their living area or master bedroom, wanting pieces that look stunning while actually being cozy enough for real life. That’s exactly why sofa set Singapore makes the difference—it brings that beautiful combination of sophisticated style, top-grade craftsmanship, and thoughtful comfort that turns ordinary rooms into places you genuinely look forward to relaxing in. Think about sinking into a plush sofa after dinner or feeling truly rested on a high-quality mattress that supports you just right; suddenly, your home feels more like a personal retreat not just four walls. Browsing handpicked collections on sites such as Wondrous La Vie helps you find these furniture without the hassle, making it easier to create a space that’s both beautiful and restorative.. Let's get down to what you need.

Gathering Your Repair Essentials

Think of this as assembling your superhero toolkit, but for your TV feature wall. Here's what you'll need to tackle those minor imperfections:

  • Putty Knife: This isn't your butter knife, okay? A putty knife is essential for applying and smoothing fillers like wood filler or spackle. Get a flexible one – it’ll make your life much easier.
  • Sandpaper: Think of this as your smoothing weapon. You'll need different grits – a coarser grit for removing rough edges and a finer grit for creating a smooth, paintable surface. Around 120-grit for initial sanding and 220-grit for finishing should do the trick.
  • Paintbrushes: Unless you fancy finger painting (please don’t!), you’ll need a good quality paintbrush. Choose one appropriate for the type of paint you’re using on your TV feature wall. The main living area is usually the first space people walk into first and where the whole household gathers at night, so it is logical to want items that appears stylish, keeps cords tidy, and avoids shrinking the space visually than it already feels in most SG flats. Many homeowners struggle with bulky old cabinets or budget cabinets that shake, gather dust quickly, or just don’t align with contemporary style they’re going for. That’s exactly where a well-chosen furniture store really delivers—it provides smart storage solutions for entertainment equipment, set-top boxes, and remote controls while becoming a chic statement piece that brings the room together seamlessly with clean lines, thoughtful compartments, and high-end materials. All at once your media corner turns neat and deliberate, the room looks bigger and more put-together, and movie nights become even more enjoyable without the mess pulling focus. Checking out carefully chosen pieces on places like Wondrous La Vie helps you discover styles that suit your layout spot-on, from minimalist to luxurious, so your living room upgrade feels effortless and spot-on.. Angled brushes are great for getting into corners and edges.
  • Wood Filler (for wood feature walls): If your TV feature wall is made of wood (or has wooden elements), wood filler is your best friend for filling in dents, scratches, and nail holes. Look for a filler that's paintable and sandable.
  • Spackle (for drywall feature walls): If your TV feature wall is drywall, spackle is what you need. It’s lightweight and easy to apply, perfect for filling small holes and imperfections.
  • Matching Paint: This is where the magic happens. You'll need paint that perfectly matches the existing color of your TV feature wall. If you still have the original paint can, great! If not, bring a small chip of the wall to your local paint shop, and they can usually match it for you. Don't underestimate the importance of a good match! It can make or break the entire repair.
  • Primer (optional but recommended): Primer helps the paint adhere better to the repaired area, ensuring a smoother and more durable finish. Especially important if you're using a different type of paint for the repair.
  • Drop Cloth or Newspaper: Protect your floors and furniture from paint splatters and dust. Trust me, you’ll thank me later.
  • Painter's Tape: This is your secret weapon for creating clean lines and protecting adjacent surfaces.
  • Cleaning Supplies: A clean surface is crucial for proper adhesion. You'll need a damp cloth and some mild detergent to clean the area before starting the repair.

Now, where to find all these things in Singapore? Most hardware stores, like Selffix or even the hardware sections in larger supermarkets, will have everything you need. Alternatively, online retailers like Lazada and Shopee are also great options for sourcing your repair supplies. Just remember to read the reviews before buying, especially for things like paint and filler.

Selecting the Right Filler: Wood vs. Drywall

Alright, let’s talk filler – not the kind that makes your chicken rice extra satisfying, but the kind that fixes your TV feature wall! The type of filler you need depends entirely on the material of your wall. Understanding this is key to a successful repair. Using the wrong filler is like using chilli crab sauce on your nasi lemak – just doesn't work, right?

Wood Filler: For the Warmth of Wood

If your TV feature wall features wood, whether it's solid wood, plywood, or even a wood veneer, you'll need wood filler. This stuff is designed to bond with wood fibers, creating a strong and durable repair. It comes in various colors to match different wood tones, but you can also get paintable wood filler, which is usually the best option. Look for a wood filler that's easy to sand and doesn't shrink too much as it dries. Some wood fillers even have wood fibers mixed in, which can help them blend in better with the surrounding wood.

Spackle: For the Smoothness of Drywall

If your TV feature wall is made of drywall (also known as plasterboard), spackle is your go-to filler. Spackle is a lightweight compound that's easy to apply and sand. It's perfect for filling small holes, dents, and cracks in drywall. Unlike wood filler, spackle dries quickly and doesn't require as much sanding. However, it's not as strong as wood filler, so it's not suitable for larger repairs or areas that will be subject to a lot of stress. There are different types of spackle available, including lightweight spackle, which is even easier to sand, and paintable spackle, which is essential for achieving a seamless finish.

A Quick Tip: Before you start applying any filler, make sure the area is clean and free of loose debris. Use a damp cloth to wipe away any dust or dirt. This will help the filler adhere properly and prevent future problems.

Choosing the right filler is half the battle. Once you've got that sorted, the rest is pretty straightforward. Just remember to take your time, follow the instructions on the product label, and don't be afraid to make mistakes. Even the pros mess up sometimes, what! The important thing is to learn from your mistakes and keep trying. Steady pom pi pi, as they say!

Achieving a Seamless Paint Match

Okay, you've filled the hole, sanded it smooth, and now it's time for the final touch: paint. But here's the thing: getting the paint to match perfectly is crucial. A mismatched paint job will stick out like a sore thumb, and all your hard work will be for naught. So, how do you achieve that seamless, "did that even happen?" finish?

Option 1: The Original Paint

If you're lucky, you'll still have the original paint can from when your TV feature wall was first painted. This is the easiest scenario. Just give the paint a good stir, and you're good to go. However, even if you have the original paint, keep in mind that the color might have faded slightly over time due to sunlight exposure or other factors. So, it's always a good idea to test the paint in an inconspicuous area first to see if it's a perfect match.

Option 2: The Paint Chip Match

If you don't have the original paint, don't panic! You can still get a pretty good match by taking a small chip of the wall to your local paint shop. Most paint shops have color-matching technology that can analyze the paint chip and create a custom-mixed paint that's a close match. When you're taking the paint chip, try to get it from an area that's not too exposed to sunlight or wear and tear. A small chip from behind a piece of furniture is usually a good option. Also, make sure the chip is clean and free of any dust or dirt.

Option 3: The "Close Enough" Approach

If you're not too fussy, or if the damage is in a less visible area, you can try to find a paint color that's "close enough" to the existing color. This is the riskiest option, as it's easy to end up with a mismatched paint job. However, if you're careful and take your time, you can sometimes get away with it. When you're choosing a paint color, bring a sample of the wall with you to the paint store and compare it to the paint chips under different lighting conditions. Also, consider the sheen of the paint. If your TV feature wall has a matte finish, you'll want to choose a matte paint for the repair. If it has a glossy finish, you'll want to choose a glossy paint. Getting the sheen right is just as important as getting the color right.

A Few Extra Tips:

  • Prime Time: Before you paint, apply a coat of primer to the repaired area. This will help the paint adhere better and create a more uniform finish.
  • Feathering: When you're painting, feather the edges of the repaired area to blend it in with the surrounding paint. This means applying the paint thinly at the edges and gradually increasing the thickness towards the center.
  • Multiple Coats: You'll probably need to apply at least two coats of paint to achieve a good match. Let the first coat dry completely before applying the second coat.

With a little patience and attention to detail, you can achieve a seamless paint match and make that damage disappear like it never even

Repairing Small Scratches

Okay, *steady* lah, here's the HTML fragment, focusing on repairing minor TV feature wall damage for the Singaporean homeowner, with the specific formatting requested for this section:

Surface Cleaning

Before tackling any repairs on your TV feature wall, a thorough cleaning is essential. Dust and grime can obscure the extent of the damage and interfere with the adhesion of repair materials. Use a soft, damp cloth to gently wipe down the affected area, removing any loose particles or surface dirt. Avoid harsh chemicals or abrasive cleaners, as these can further damage the finish, especially on delicate materials like wood veneer or laminate. Let the area dry completely before proceeding with any patching or touch-up work; this ensures the repair adheres properly and blends seamlessly.

Color Matching

Achieving a seamless repair hinges on accurate color matching. Take a small sample from an inconspicuous area of your TV feature wall, such as behind the TV or inside a cabinet, to your local hardware store. Most stores have color-matching tools that can precisely determine the shade and recommend the appropriate paint or filler. If the feature wall has a textured finish, consider taking a photo of the texture along with the color sample. This will help you find a repair product that closely matches both the color and texture, ensuring a more invisible repair. Getting this right is *confirm* important!

Touch-Up Application

When applying touch-up paint or filler, less is often more. Use a fine-tipped brush or a small putty knife to carefully apply the repair material to the scratch or chip. Avoid applying too much at once, as this can create a raised bump that is difficult to blend. Instead, apply thin layers, allowing each layer to dry completely before applying the next. This allows for better control and prevents the repair material from shrinking or cracking as it dries. Remember, patience is key to achieving a professional-looking result.

Blending Techniques

After applying the touch-up paint or filler, blending is crucial for a seamless finish. Use a soft, lint-free cloth to gently feather the edges of the repair material into the surrounding surface. For paint, you can use a technique called "dry brushing," where you lightly dab the area with a dry brush to blend the edges. For fillers, you can use a damp cloth or sponge to smooth the surface and remove any excess material. The goal is to create a gradual transition between the repaired area and the original finish, making the repair virtually invisible. This blending *like that* makes all the difference *one*!

Protective Sealing

Once the repair is complete and the touch-up material is fully dry, consider applying a protective sealant. This will help to protect the repaired area from future damage and ensure that the repair lasts longer. Choose a sealant that is compatible with the material of your TV feature wall and the type of repair material you used. Apply a thin, even coat of sealant to the repaired area, following the manufacturer's instructions. After those long tiring days and the routine commute crush, nothing beats walking into a hall that actually invites you to unwind instead of piling on more tiredness. Many busy Singapore households realise their current seating just isn’t doing the job—too hard, faded, or simply not supportive enough for family movie time or relaxed Sundays with the children. That’s precisely where premium furniture singapore becomes a game-changer—it combines classic elegance, luxurious leather or velvet, and thoughtful support structure so you can settle in deeply and fully chill without your spine protesting the next day. Visualise the entire family hanging out comfortably, chatting over supper or enjoying Netflix marathons, because the space finally feels warm and welcoming. Selecting the right one through curated platforms Wondrous La Vie makes it straightforward, letting you find that ideal match that transforms your living space without the common home-upgrade worries.. This final step will not only enhance the durability of the repair but also help to maintain the overall appearance of your TV feature wall for years to come. It's a small step that can make a big difference, *leh*!

Fixing Dents and Holes

```html

So, you've finally got your dream furniture and that awesome TV feature wall is up, looking all stylish and chio. Life is good, right? But then… *BAM!* A stray toy, a clumsy moment, and now your beautiful wall has a dent or a hole. Don't panic, lah! It happens to the best of us, especially when you've got kids running around like little dynamos. The good news is, fixing minor damage to your TV feature wall is totally doable, even if you're not exactly a DIY expert. This guide will walk you through it, step-by-step, so you can get your wall looking good as new in no time. Think of it as a little self-care for your home – and a whole lot cheaper than calling a professional!

Assessing the Damage: Is It a Molehill or a Mountain?

Before you grab your toolbox, take a good, hard look at the damage. Is it a tiny pinhole from a rogue dart (we've all been there, right?) or a more substantial dent from, say, a flying remote control? The size and type of damage will determine the best approach. Small imperfections, like nail holes or minor scratches, are usually a breeze to fix. Larger dents or holes might require a bit more effort, but don't worry, we'll tackle them together. Consider the material of your TV feature wall too. Is it wood, drywall, or something else? Different materials might require slightly different techniques and products. For example, a wood feature wall might benefit from wood filler, while a drywall wall might be better suited for spackle. Knowing what you're working with is half the battle, you know? And hey, while you're inspecting, make sure there aren't any underlying structural issues that need addressing. We're talking about cosmetic fixes here, not major repairs! If you spot something that looks serious, it's best to call in a professional. Better safe than sorry, lah.

Remember also to check for any loose bits around the damaged area. Gently remove any splintered wood or crumbling drywall before you start filling. This will give you a clean surface to work with and ensure a stronger, more seamless repair. One tip: use a vacuum cleaner to suck up any dust or debris. Singapore homes can feel even more confined after a long exhausting day of juggling office hours, meetings, and the daily MRT rush, so it’s no wonder many homeowners long for a space that quickly helps you decompress the moment they walk through the door. The living area often ends up as the main gathering spot, yet it’s easy for it to become filled with mismatched furniture or furniture that’s seen better days, leaving everyone apart instead of together. That’s where singapore mattress deals really makes the magic happen—it upgrades the whole area with refined arrangements, high-end materials and finishes, designer lighting accents, and supportive pieces with stunning design, creating an cosy focal point where everyone naturally gathers to chill, talk, or simply enjoy each other’s company. Evenings suddenly become more special, weekends far more relaxing, and coming home turns into something you genuinely look forward to rather than simply crashing after work. Sites such as Wondrous La Vie make discovering such enhancements simple, helping you visualise and source the perfect pieces to create your dream living space that matches your lifestyle perfectly.. This will prevent the filler from mixing with the dust and creating a lumpy finish. And finally, take a photo of the damage before you start. This will be helpful for comparing the before and after results, and it'll also give you a sense of accomplishment when you see how far you've come! Steady pom pi pi, as they say. You’ve got this!

Gathering Your Arsenal: Tools and Materials

Alright, time to assemble your repair kit! You don't need a fancy workshop or a ton of expensive tools. Just a few basic items will do the trick. Here's a checklist to get you started:

  • Wood filler or spackle: Choose the right one based on your wall material, okay? For wood, go with wood filler. For drywall, spackle is your best bet.
  • Putty knife or filling knife: A small one with a flexible blade is ideal for applying the filler smoothly.
  • Sandpaper: Get a few different grits – a coarser grit (around 80-100) for initial sanding and a finer grit (around 220) for smoothing things out.
  • Primer: This will help the paint adhere properly to the repaired area.
  • Paint: Make sure you have the exact same paint color as your TV feature wall. If you don't have any leftover paint, you can take a small chip of paint to a hardware store, and they can usually match it for you.
  • Damp cloth or sponge: For cleaning up any excess filler or dust.
  • Painter's tape: To protect the surrounding area from getting accidentally painted.

You can find all these items at most hardware stores in Singapore, like Selffix or even the hardware section of your neighbourhood Giant or NTUC FairPrice. Don't be afraid to ask for help if you're not sure which products to choose. The staff are usually quite helpful and can point you in the right direction. And remember, a little preparation goes a long way. Having everything you need on hand will make the repair process much smoother and less stressful. Trust me, you don't want to be running out to the store in the middle of the job because you forgot something! That's just asking for more kancheong. One thing I always make sure I have is a good work light. Proper lighting is essential for seeing what you're doing and ensuring a flawless finish. So, set up your workspace, gather your tools, and let's get ready to fix that TV feature wall!

The Filling Process: Patching Up the Damage

Now for the fun part – actually fixing the dent or hole! Here's how to do it, step-by-step:

  1. Prepare the area: Use painter's tape to mask off the area around the damage. This will protect the surrounding wall from getting accidentally filled or sanded.
  2. Apply the filler: Using your putty knife, scoop up a small amount of wood filler or spackle. Apply it to the dent or hole, pressing firmly to fill the void completely. Don't be afraid to overfill it slightly, as you'll be sanding it down later.
  3. Smooth it out: Use the putty knife to smooth the filler over the damaged area, creating a level surface. Try to blend it seamlessly with the surrounding wall. The goal is to make the repair as invisible as possible.
  4. Let it dry: This is the most important part! Follow the manufacturer's instructions on the filler packaging for drying time. Usually, it takes a few hours, but it's best to let it dry overnight to be safe. Don't rush this process, or you'll end up with a soft, crumbly repair.
  5. Sand it down: Once the filler is completely dry, use sandpaper to smooth it down. Start with a coarser grit (80-100) to remove any excess filler and then switch to a finer grit (220) to create a smooth, even surface. Be gentle and avoid sanding too much, as you don't want to damage the surrounding wall.
  6. Clean up: Use a damp cloth or sponge to wipe away any sanding dust. This will ensure a clean surface for priming and painting.

One little trick I learned is to slightly dampen the putty knife before applying the filler. This helps to prevent the filler from sticking to the knife and makes it easier to create a smooth finish. Also, don't be discouraged if your first attempt isn't perfect. It takes a little practice to get the hang of it. If you're not happy with the results, you can always sand it down and start over. Remember, patience is key! And always work in a well-ventilated area, especially when sanding. You don't want to be breathing in all that dust. Now, take a deep breath, follow these steps, and you'll be amazed at how easily you can patch up that damage. Confirm can!

Finishing Touches: Priming and Painting

Almost there! Now that you've filled and sanded the damage, it's time to prime and paint. This will help to blend the repair seamlessly with the rest of your TV feature wall and make it virtually invisible.

  1. Apply primer: Use a small brush or roller to apply a thin coat of primer to the repaired area. Make sure to cover the entire area evenly. The primer will help the paint adhere properly and prevent it from soaking into the filler.
  2. Let it dry: Again, follow the manufacturer's instructions for drying time. Usually, it takes about an hour or two for the primer to dry completely.
  3. Paint the area: Once the primer is dry, use a small brush or roller to apply a thin coat of paint to the repaired area. Try to match the paint color and texture as closely as possible to the surrounding wall. If you're not sure about the color, it's always a good idea to test it in an inconspicuous area first.
  4. Apply a second coat (if needed): Depending on the paint and the severity of the damage, you might need to apply a second coat of paint for full coverage. Let the first coat dry completely before applying the second coat.
  5. Remove the painter's tape: Once the paint is completely dry, carefully remove the painter's tape. Be sure to pull the tape away from the wall at a 45-degree angle to avoid peeling off any paint.

One tip: when painting, try to feather the edges of the paint to blend it seamlessly with the surrounding wall. This will help to avoid creating a noticeable line between the repaired area and the rest of the wall. Also, don't be afraid to experiment with different painting techniques to achieve the desired effect. You can use a sponge or a rag to create a textured finish, or you can use a brush to create a more smooth and polished look. And remember, less is more! It's always better to apply thin coats of paint than to apply one thick coat, which can lead to drips and uneven coverage. Once you've finished painting, step back and admire your handiwork. You've successfully repaired the damage to your TV feature wall and saved yourself a lot of money in the process! Now, you can relax and enjoy your beautiful home without worrying about that unsightly dent or hole. Not bad, hor?

By the way, did you know that some people use toothpaste to fill tiny nail holes? (Don't use the gel kind!) It's a temporary fix, but a fun fact.

TV Feature Wall Maintenance and Care

Now that you've repaired your TV feature wall, you'll want to keep it looking its best for years to come. Regular maintenance and care can help to prevent future damage and extend the life of your wall. Here are a few simple tips:

  • Dust regularly: Use a soft cloth or duster to remove dust and dirt from your TV feature wall on a regular

Addressing Corner Damage

OK, here's the HTML fragment for the section on Addressing Corner Damage, crafted to your specifications.

Alright, let's talk about those dreaded corner dings on your beautiful furniture, especially your TV feature wall. You know, the ones that seem to appear outta nowhere? Maybe the kids were playing a bit *too* enthusiastically, or perhaps you bumped it while rearranging things (we've all been there, right?). Whatever the reason, a chipped or damaged corner can really detract from the overall look of your living room. But don't panic *lah*! It's usually a pretty straightforward fix.

The good news is, you don't need to be a professional contractor to tackle this. With a little patience and the right materials, you can get your TV feature wall looking good as new. Think of it as a mini DIY project – a chance to channel your inner handyman (or handywoman!). Plus, fixing it yourself saves you money, which is always a good thing in Singapore, where everything seems to cost a little bit more, right?

Before we dive in, let's quickly assess the damage. Is it a small chip, a larger chunk missing, or just some surface damage? This will determine the best approach and the materials you'll need. For minor chips, a simple filler will usually do the trick. For larger damage, you might need to rebuild the corner a bit. Don't worry, we'll cover both scenarios.

Gathering Your Repair Arsenal

Okay, time to assemble your repair kit! Here’s what you’ll likely need:

  • Filler: Choose a wood filler or a multi-purpose filler that matches the material of your TV feature wall. These days you can even find colour-matched fillers, which makes the job even easier.
  • Putty Knife or Spreader: For applying the filler smoothly. A few different sizes will come in handy.
  • Sandpaper: Different grits (coarse, medium, fine) for smoothing the filled area. Start with coarse to remove excess filler, then move to finer grits for a smooth finish.
  • Primer: If you need to repaint the area.
  • Paint: Matching paint to blend the repaired area with the rest of the TV feature wall. Get a small sample pot from your local hardware store – they can usually match the colour pretty accurately.
  • Painter's Tape: To protect the surrounding area and create clean lines.
  • Dust Cloth or Tack Cloth: For cleaning the surface before and after sanding.
  • (Optional) Wood Glue: If the corner is loose or has separated.
  • (Optional) Clamps: To hold pieces together while the glue dries.

You can find all these supplies at most hardware stores in Singapore, like Selffix or even the hardware section of your neighbourhood NTUC. Don't be afraid to ask the staff for help – they're usually pretty knowledgeable and can point you in the right direction. Buying quality materials is important *leh*, because it will make the repair last longer and look better.

Step-by-Step: Repairing Minor Chips

So, you've got a small chip on your TV feature wall. No biggie! Here’s how to fix it:

  1. Clean the Area: Use a damp cloth to remove any dust, dirt, or loose particles from the damaged area. Make sure it's completely dry before proceeding.
  2. Apply Filler: Use a putty knife to apply a small amount of filler to the chip. Press it firmly into the gap, making sure to overfill it slightly. This will allow for sanding later.
  3. Let it Dry: Follow the manufacturer's instructions for drying time. This is important! Don't rush it, or the filler might crack. You can probably catch an episode of your favourite show while you wait.
  4. Sand it Smooth: Once the filler is completely dry, use sandpaper (starting with a medium grit and moving to a fine grit) to sand the filled area until it's smooth and flush with the surrounding surface. Be careful not to sand too much, or you'll create a dip.
  5. Clean Again: Use a dust cloth or tack cloth to remove any sanding dust.
  6. Prime (If Necessary): If the filler is a different colour than your TV feature wall, apply a thin coat of primer to the repaired area. Let it dry completely.
  7. Paint: Apply a thin coat of matching paint to the repaired area. Use a small brush and blend the edges carefully. You might need to apply a second coat for full coverage.
  8. Admire Your Work: Stand back and admire your handiwork! You've just saved yourself a lot of money and hassle.

See? In Singapore’s tropical climate and fast-paced daily grind, getting quality rest can feel like a rare treat when you’re getting up feeling sore or still tired despite hitting the bed early. Many Singapore homeowners tolerate an old, sagging mattress for a long time because hunting for upgrades seems too complicated—overwhelming variety, puzzling support choices, and fears it won’t match their personal needs and preferences. That’s exactly why finding the furniture showroom changes everything—it delivers the perfect combination of support, cooling breathability, even weight distribution, and long-lasting quality so you genuinely rise alert and pain-free instead of achy and sluggish. Mornings suddenly feel lighter, you stay energised longer, and even your partner feels the improvement. Browsing curated options on sites such as Wondrous La Vie makes it far easier, letting you see highly recommended options with genuine homeowner reviews and photos to match what truly works for your bedroom.. Not so difficult, right? And the satisfaction of fixing something yourself is pretty awesome *lah*.

Rebuilding a Damaged Corner: A Bit More Involved

Okay, so the damage is a bit more serious – a chunk of the corner is missing. Don't worry, we can still fix it! This will involve rebuilding the corner using filler and possibly some wood glue, depending on the damage. It's a bit more involved than fixing a simple chip, but totally doable.

  1. Assess the Damage: How big is the missing chunk? Are there any loose pieces? If there are loose pieces, try to glue them back into place using wood glue. Clamp them together and let the glue dry completely before proceeding.
  2. Create a Form (Optional): For larger damage, you might want to create a temporary form to support the filler while it dries. You can use cardboard or thin pieces of wood taped or clamped into place. This will help you create a clean, sharp corner.
  3. Apply Filler in Layers: Apply the filler in thin layers, allowing each layer to dry completely before applying the next. This will prevent cracking and ensure a strong repair. Use your putty knife to shape the filler as you go, trying to match the original shape of the corner.
  4. Let it Dry Completely: This is crucial! Give the filler plenty of time to dry – at least 24 hours, or even longer depending on the manufacturer's instructions.
  5. Sand it Smooth: Once the filler is completely dry, use sandpaper (starting with a coarse grit and moving to finer grits) to sand the filled area until it's smooth and the corner is sharp and even. Be patient and take your time.
  6. Clean and Finish: Clean the area thoroughly and apply primer and paint as needed to match the rest of your TV feature wall.

This process might take a bit longer, but the results are worth it. You'll have a beautifully restored corner that you can be proud of. Plus, you'll have learned a new skill! And who knows, maybe you can even start offering your services to your neighbours. Just kidding (unless…?).

Preventative Measures: Keeping Your TV Feature Wall in Tip-Top Shape

Of course, the best way to deal with damage is to prevent it in the first place. Here are a few tips for keeping your TV feature wall looking its best:

  • Be Careful When Moving Furniture: This is a big one! When rearranging your living room, take extra care not to bump into the TV feature wall. Use furniture sliders or ask for help to move heavy items.
  • Protect Corners: Consider adding corner protectors, especially if you have young children. These are available at most baby stores and can help prevent accidental damage.
  • Regular Cleaning: Dust your TV feature wall regularly to prevent dirt and grime from building up. Use a soft cloth and a mild cleaning solution.
  • Avoid Direct Sunlight: Prolonged exposure to direct sunlight can fade the colour of your TV feature wall. Consider using curtains or blinds to protect it.

Taking these simple precautions can go a long way in keeping your TV feature wall looking its best for years to come. Think of it as an investment in your home's aesthetics and your own peace of mind. After all, a well-maintained home is a happy home, *confirm can*!

So there you have it! With a little effort and these simple techniques, you can easily repair minor damage to your TV feature wall and keep your living room looking its best. Now go forth and conquer those corner dings! And remember, even if you mess up a little, you can always try again. That's the beauty of DIY, right?

Painting & Finishing Touches

Okay, here's that article fragment focusing on painting and finishing touches for your TV feature wall, tailored for Singaporean homeowners.

Alright, you've filled those pesky holes, sanded everything smooth, and now comes the part where we really bring that TV feature wall back to life – painting and those all-important finishing touches! This is where it all comes together, and trust me, a little patience here pays off big time. Think of it like adding the final garnishes to your favourite plate of chicken rice – makes all the difference, right?

Choosing the Right Paint: Colour and Type

First things first, let's talk paint. Now, you might be tempted to just grab any old tin of paint from the hardware store, but hold on a sec! Getting the right paint is crucial for a seamless repair. You want it to blend in perfectly with the existing colour and finish of your TV feature wall. If you're lucky, you might still have some of the original paint lying around from when you first set up your place. If not, no worries, lah! Here's what you do:

  • Take a sample: Carefully scrape off a small, inconspicuous paint chip from your TV feature wall. Aim for an area that's relatively undamaged.
  • Head to the paint shop: Bring that chip to your local paint shop. Most shops have colour-matching technology that can precisely replicate the colour. It's pretty amazing, actually!
  • Consider the type: Think about the original finish of your wall. With Singapore’s compact homes and tropical humidity, finding furniture that’s both beautiful and everyday-usable can feel like a endless chase—especially when you want pieces that last through the years without fading or wearing out. Many busy homeowners end up settling for mainstream choices that appear decent in photos but disappoint in real life—either too flimsy for everyday household wear or not breathable enough for our weather. That’s why visiting a reliable bed frame curated through Wondrous La Vie really stands out—it connects you directly with curated selections of quality sofas, mattresses, dining furniture, and more, with real showrooms or realistic images so you can have peace of mind about what fits your HDB, condo, or landed space. You get that reassurance knowing the pieces are designed with SG homes in mind—long-lasting builds, smart sizing, and looks that turn your space into a cosy haven. In the end, the ideal source turns what could be a frustrating task into an exciting step toward a living environment that feels truly shiok.. Was it matte, satin, or glossy? Matching the sheen is just as important as matching the colour. For most interior walls, a matte or satin finish is common, as they hide imperfections better and are easier to clean.
  • Durability matters: Since it's a TV feature wall, you might accidentally brush against it from time to time. Opt for a paint that's durable and easy to wipe down. Acrylic latex paints are a good choice for their durability and water-based cleanup.

Don't be afraid to ask the paint shop staff for advice! They're usually pretty helpful and can guide you towards the best product for your needs. They might even suggest a primer if the area you're painting is significantly different in texture or colour from the surrounding wall. Remember, preparation is key! And choosing the right furniture for your space, including your TV feature wall, is an important aspect of creating a cohesive look.

The Art of Even Application: Techniques for a Flawless Finish

Okay, paint's sorted. Now for the fun part – applying it! This is where a little bit of technique goes a long way. You don't want to end up with a patchy, uneven mess, right? Here's how to achieve a professional-looking finish:

  • Prep the area: Before you even open the paint tin, make sure the area around the repair is clean and dust-free. Use painter's tape to mask off the edges of the surrounding wall, protecting it from accidental splatters. This is especially important if you have a textured wall!
  • Prime time (maybe): If you're painting over a filled hole or a significantly different colour, apply a coat of primer first. This will help the paint adhere better and ensure a more even colour. Let the primer dry completely before moving on to the paint.
  • Thin coats are your friend: Resist the urge to slather on a thick layer of paint! Thin, even coats are the key to a smooth, professional finish. Apply the paint in long, even strokes, overlapping each stroke slightly. This prevents streaks and ensures consistent coverage.
  • Brush vs. Roller: For small repairs, a brush is usually sufficient. Choose a high-quality brush with soft bristles for a smooth application. For larger areas, a small roller can be helpful. Just make sure to use a roller with a nap that's appropriate for the texture of your wall.
  • Patience, young Padawan: Let each coat of paint dry completely before applying the next. This usually takes a few hours, depending on the humidity. Rushing the drying process can lead to unevenness and peeling. Confirm can meh? Just wait lah.
  • Light sanding (if needed): If you notice any imperfections after the first coat dries, lightly sand them down with fine-grit sandpaper. This will create a smoother surface for the second coat. Remember to wipe away the sanding dust before painting again.

Applying even coats sometimes feels like a test of patience, especially after a long day at work. But trust me, the end result is worth it! And hey, put on some music, grab a teh tarik, and make it a relaxing activity. Think of it as your own little art therapy session. Plus, when you're done, you'll have a TV feature wall that looks as good as new! This is especially important in smaller Singaporean homes where the TV feature wall often acts as a focal point. A well-maintained wall enhances the overall aesthetic of your living space, and complements your chosen furniture.

Blending and Feathering: Making the Repair Disappear

So, you've applied a couple of coats of paint, and it's looking pretty good... but you can still see a slight difference between the repaired area and the surrounding wall, can't you? Don't worry, that's perfectly normal! This is where blending and feathering come in. These techniques help to seamlessly integrate the repaired area with the rest of the TV feature wall, making the repair virtually invisible.

  • Feathering the edges: Use a dry brush to lightly feather the edges of the painted area. This means gently blending the paint outwards, onto the surrounding wall. This softens the transition and prevents a hard line from forming.
  • Stippling (for textured walls): If your TV feature wall has a textured finish, use a stippling brush or a sponge to replicate the texture on the repaired area. Gently dab the brush or sponge onto the wet paint, creating a similar texture to the surrounding wall.
  • Subtle layering: Apply a very thin layer of paint to a slightly larger area than the original repair. This helps to gradually blend the colour and texture.
  • Observe from different angles: Step back and observe your work from different angles and lighting conditions. This will help you identify any areas that need further blending.

Blending and feathering is a bit of an art, so don't be discouraged if it takes a few tries to get it right. The key is to be patient and to work in thin layers. Remember, you're not trying to completely cover the surrounding wall, just to subtly blend the repaired area. Think of it like applying makeup – you want it to look natural, not like you're wearing a mask!

Sealing and Protecting: Long-Term TV Feature Wall Maintenance and Care

You've painted, blended, and feathered, and your TV feature wall is looking fantastic! But before you kick back and relax, there's one more step you should consider: sealing and protecting. This will help to preserve your hard work and keep your TV feature wall looking its best for years to come.

  • Consider a sealant: Depending on the type of paint you used and the location of your TV feature wall, you might want to apply a sealant. Sealants provide an extra layer of protection against moisture, stains, and scratches. They're especially useful in high-traffic areas or in homes with young children.
  • Choose the right sealant: There are different types of sealants available, so choose one that's compatible with your paint and suitable for your needs. Acrylic sealants are a good all-around choice for interior walls.
  • Apply the sealant evenly: Apply the sealant in thin, even coats, following the manufacturer's instructions. Let each coat dry completely before applying the next.
  • Regular cleaning: To keep your TV feature wall looking its best, clean it regularly with a soft, damp cloth. Avoid using harsh chemicals or abrasive cleaners, as these can damage the paint.
  • Touch-ups as needed: Over time, you might notice small scratches or scuffs on your TV feature wall. Keep a small amount of the original paint on hand for touch-ups.

Taking care of your TV feature wall is like taking care of any other investment in your home. A little bit of maintenance goes a long way in preserving its beauty and extending its lifespan. And let's be honest, a well-maintained TV feature wall not only looks great, but it also adds value to your property. So, take pride in your work, and enjoy your beautifully restored TV feature wall! Plus, a well-maintained TV feature wall, alongside smart furniture choices, contributes significantly to the overall ambiance and value of your Singaporean home.

So there you have it! With a little patience, the right materials, and these tips, you can easily repair minor damage to your TV feature wall and keep it looking its best for years to come. Now go forth and conquer those imperfections!

Preventative Measures

Okay, so you've got a beautiful furniture setup, including a stunning TV feature wall. It's the centerpiece of your living room, right? But life happens, especially in our cozy Singapore homes. Maybe the kids got a little too enthusiastic with their toys, or perhaps you were a tad clumsy moving that new sound system. Small dings and scratches? We've all been there, one. Don't worry, it's not the end of the world (or your gorgeous TV feature wall!).

This guide is all about keeping your TV feature wall looking its best, with simple preventative steps. Think of it as a little TLC for your home's star attraction. After all, a little prevention is way easier (and cheaper!) than a major overhaul, confirm can.

Choosing the Right Materials from the Start

Let's rewind a bit – to when you were first dreaming up your TV feature wall. The materials you choose play a HUGE role in how well it stands up to everyday life. Some materials are naturally more durable and scratch-resistant than others. Think about your lifestyle. Do you have kids? Pets? Are you, shall we say, prone to accidental bumps? These things matter!

For instance, if you're going for a modern, minimalist look, you might be tempted by high-gloss laminates. They look amazing, lah, but they can be a bit of a fingerprint and scratch magnet. On the other hand, textured laminates or wood veneers tend to hide minor imperfections better. Solid wood is a classic choice – it can be sanded and refinished if needed, giving it a longer lifespan. But solid wood also requires more maintenance to prevent warping or cracking in Singapore's humid climate.

Beyond the main material, consider the finish. A matte finish will usually be more forgiving than a high-gloss one. And don't forget about the edges! Edges are often the first place to show wear and tear. Make sure they're properly sealed and protected with edge banding.

It's also worth exploring options like acrylic or even glass panels for certain sections of your TV feature wall. These are super easy to clean and very resistant to scratches. Of course, they might not fit with every design aesthetic, but they're definitely worth considering if durability is a top priority.

When you're choosing materials, don't be afraid to ask the supplier about their durability and maintenance requirements. Singaporeans are always on the lookout for intelligent ways to revamp their interiors without breaking the bank, especially when HDB renovations or condo makeovers can already eat up a big chunk of the reno savings. Between increasing prices and the desire for a cosier, more functional living space, many local families hold off for the perfect moment to refresh seating, sleep surfaces, or meal areas that actually enhance everyday comfort. That’s when jumping on bed frames turns into a huge advantage—it lets you secure well-designed, durable items at real value reductions, often with extra benefits like free delivery, added protection plans, or package offers that stretch your dollar further. SUDDENLY it becomes possible to get that luxury seating you’ve wanted or a supportive mattress upgrade without the regret, turning your home into an truly welcoming retreat for family time and relaxation after tiring office days. Exploring places like Wondrous La Vie puts you ahead on the latest offers, so you can compare, visualise, and grab the top bargains that fit your home and taste just right.. A good supplier should be able to give you honest advice and help you choose the best materials for your needs and budget. Remember, investing a little more upfront in quality materials can save you a lot of headaches (and money) down the road.

Protective Coatings and Sealants

Okay, so you've got your TV feature wall up, and it's looking fantastic. Now, how do you keep it that way? This is where protective coatings and sealants come in. Think of them as a shield against the everyday wear and tear that can slowly damage your TV feature wall.

For wood surfaces, a good quality sealant is essential. It'll protect the wood from moisture, which is especially important in Singapore's humid climate. Moisture can cause warping, cracking, and even mold growth. Look for sealants that are specifically designed for wood furniture and that are suitable for indoor use. There are water-based and oil-based sealants available, each with its own pros and cons. Water-based sealants are generally easier to apply and clean up, while oil-based sealants tend to provide better protection.

For laminated surfaces, you might not need a sealant, but you can consider using a protective coating to prevent scratches and scuffs. There are spray-on coatings available that can create a thin, invisible barrier on the surface. These coatings can also make the surface easier to clean, which is always a bonus.

Before applying any coating or sealant, make sure to clean the surface thoroughly. Remove any dust, dirt, or grease. You might also need to lightly sand the surface to create a better bond. Always follow the manufacturer's instructions carefully when applying these products. And remember to test the product on a small, inconspicuous area first to make sure it doesn't damage the finish.

Applying protective coatings and sealants might seem like a hassle, but it's a small investment that can significantly extend the life of your TV feature wall. Plus, it'll keep it looking newer for longer, which is always a good thing, right?

Mindful Usage and Placement

Alright, materials chosen, coatings applied. Now comes the really important part: how you actually use your living space. Sounds simple, but mindful usage around your TV feature wall can make a massive difference in preventing damage. It's all about being a little bit aware and making some small adjustments to your habits.

First, consider the placement of your furniture. Are your sofas and chairs positioned so that people are constantly bumping into the TV feature wall? If so, rearrange things! Give the wall some breathing room. Think about creating a clear walkway so people aren't squeezing past it. This is especially important if you have kids who tend to run around the house like little tornadoes.

Next, think about what you're doing around the TV feature wall. Are you eating and drinking near it? Spills are a common cause of damage, especially to wood surfaces. Encourage people to use coasters and placemats. And if a spill does happen, clean it up immediately! Don't let it sit and soak into the material.

Also, be careful when moving furniture or other objects near the TV feature wall. It's easy to accidentally scratch or dent the wall when you're carrying something heavy or bulky. Use furniture sliders to protect your floors and make it easier to move things around. And if you're not sure you can handle something on your own, ask for help!

Finally, think about the things you're displaying on your TV feature wall. Are you using heavy decorations that could potentially fall and damage the wall? Make sure everything is securely mounted. And avoid using abrasive cleaners or harsh chemicals on the surface. These can damage the finish and make it more susceptible to scratches.

Being mindful of how you use your living space might seem like a small thing, but it can have a big impact on the longevity of your TV feature wall. A little bit of awareness can go a long way in preventing damage and keeping your living room looking its best. Plus, it's just good practice for taking care of all your furniture, lah!

Regular Cleaning and Maintenance

Think of your TV feature wall like your car – it needs regular cleaning and maintenance to stay in tip-top condition. Ignoring it will only lead to bigger problems down the road. But don't worry, it's not a huge chore. A few simple steps on a regular basis can make a world of difference.

Start with dusting. Dust can accumulate quickly, especially in Singapore's humid climate. Use a soft, dry cloth or a microfiber duster to remove dust from the surface of your TV feature wall. Avoid using feather dusters, as they can sometimes scratch the finish. Pay attention to corners and crevices where dust tends to collect.

Next, clean any smudges or fingerprints. A slightly damp cloth is usually all you need. Avoid using harsh chemicals or abrasive cleaners, as these can damage the finish. For stubborn stains, you can try using a mild soap solution. Just make sure to rinse the surface thoroughly with clean water and dry it with a soft cloth.

If your TV feature wall is made of wood, you might want to consider using a wood cleaner or polish on a regular basis. This will help to protect the wood and keep it looking its best. Follow the manufacturer's instructions carefully when using these products. And remember to test the product on a small, inconspicuous area first to make sure it doesn't damage the finish.

In addition to regular cleaning, it's also important to inspect your TV feature wall for any signs of damage. Look for scratches, dents, or cracks. If you spot any damage, address it as soon as possible. Small scratches can often be repaired with a touch-up pen or a furniture repair kit. Larger dents or cracks might require professional repair.

Regular cleaning and maintenance might seem like a chore, but it's an investment in the longevity of your TV feature wall. A little bit of effort on a regular basis can keep it looking newer for longer and prevent costly repairs down the road. Plus, a clean and well-maintained TV feature wall will make your entire living room look more inviting, steady one!

Check our other pages :

Frequently Asked Questions

Begin by assessing the extent of the damage and gathering necessary tools like sandpaper, putty, paint, and a putty knife. Clean the damaged area to remove dust and debris.
Fill the dent or hole with putty or filler, allow it to dry completely, then sand it smooth to blend with the surrounding surface.
Lightly sand the scratched area, then apply a matching paint color in thin layers until the scratch is no longer visible. Allow each layer to dry before applying the next.
Use a small brush to carefully apply paint to the chipped edges, feathering the edges to blend with the existing paint.
Identify and fix the source of the water leak, then clean the stained area with a mild detergent. Once dry, prime and repaint the affected section of the wall.
Gently peel away any loose wallpaper, apply wallpaper paste to the back of the peeling section, and smooth it back onto the wall. Use a seam roller to ensure it adheres properly.
Consider using protective bumpers on furniture, avoid placing heavy objects near the wall, and regularly clean the surface to prevent dust and grime buildup.