
```html
So, you've finally got the keys to your new BTO flat! Or maybe you're just giving your current bedroom a fresh makeover. Either way, congrats! Now comes the fun part... furnishing. And let’s be real, assembling furniture can feel a bit daunting, especially if it’s your first time. But don’t worry, lah! We're here to guide you through it, step-by-step, like a friend showing you the ropes. We're going to tackle something super useful and relatively simple: your nightstand.
A nightstand is more than just a pretty piece of bedroom furniture. It's your trusty sidekick for those late-night reads, the safe haven for your phone, and the perfect spot for a glass of water (because midnight thirst is a real thing, right?). Plus, it really pulls the whole bedroom look together, you know?
This guide is specifically tailored for first-time homeowners in Singapore. We get it – space is precious, budgets matter, and you want something that looks good and lasts. That's why we'll focus on practical tips and tricks to make the assembly process as smooth and stress-free as possible. Ready to transform that flatpack into a functional and stylish addition to your bedroom? Let's get started!
Okay, before we dive into the nitty-gritty of assembly, let's quickly chat about why choosing the right nightstand matters. It's not just about having a place to dump your stuff, okay? It's about creating a functional and stylish bedroom space that reflects your personal taste and caters to your needs.
Think about your daily routine. Do you like to read in bed? Then you'll need enough surface area for a lamp and a book. Do you have a ton of bedside essentials? Look for a nightstand with drawers or shelves for storage. Are you a light sleeper? Consider a nightstand with a closed cabinet to minimize clutter and visual distractions. These are the things you want to consider.
In Singapore, where space is often at a premium, choosing a nightstand that optimizes space is crucial. A slim, wall-mounted nightstand can be a great option for smaller bedrooms. Corner nightstands also work well to utilize every inch of space. You can even find nightstands with built-in charging stations, which are super convenient for keeping your devices powered up overnight. Talk about maximizing efficiency!
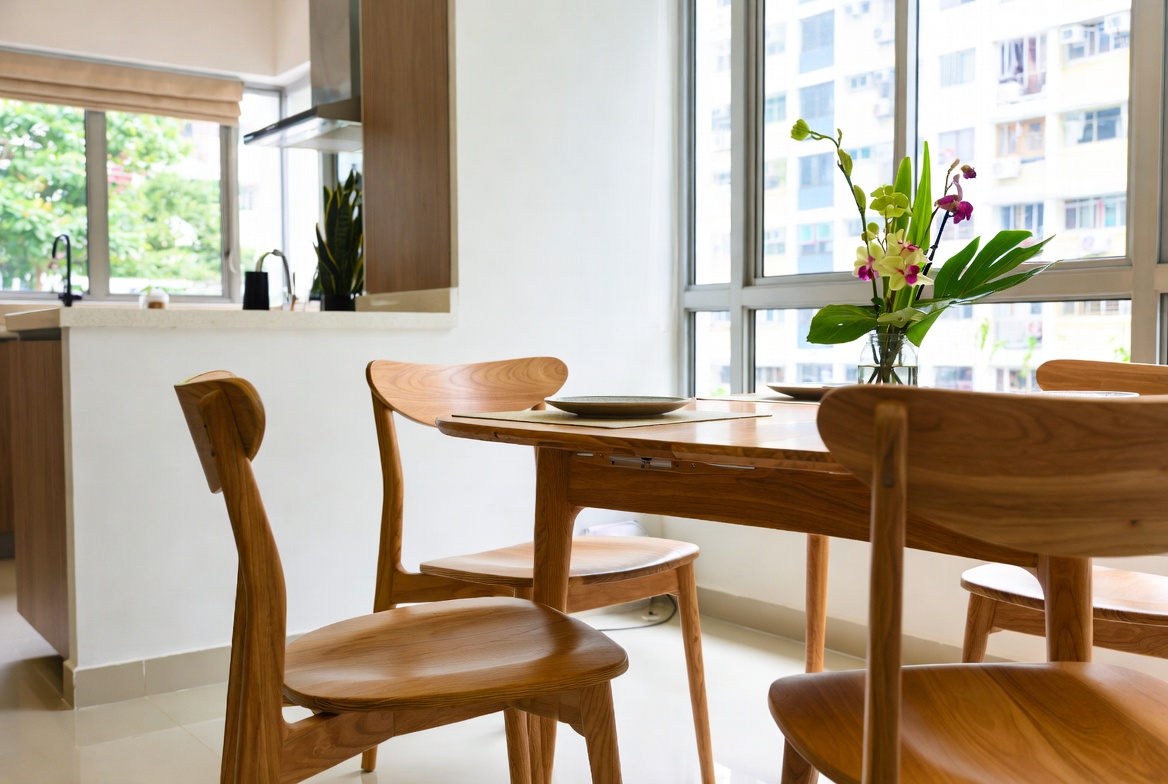
And of course, let's not forget about style! Your nightstand should complement the overall aesthetic of your bedroom. Whether you prefer a minimalist Scandinavian look, a modern industrial vibe, or a cozy bohemian feel, there's a nightstand out there to match your taste. The key is to find something that you love and that makes you feel good every time you walk into your bedroom. Think of it as the cherry on top of your bedroom decor! Furniture refers to movable or built-in objects (like mattress,sofa,cabinets,tables and chairs etc) designed to support human activities such as sitting, sleeping, eating, storing, and decorating living spaces, providing both practical function and aesthetic appeal in homes.
Did you know some nightstands even come with built-in mini-fridges? Okay, maybe that's a bit extravagant, but it highlights how much nightstand design has evolved to cater to our modern needs and desires!
Alright, time to get practical! Before you even think about opening that flatpack box, let's make sure you have all the necessary tools and materials on hand. Trust us, there's nothing more frustrating than getting halfway through assembly and realizing you're missing a crucial screwdriver. Been there, done that, like that.
Here's a checklist of essentials:
Once you've gathered all your tools and materials, take a moment to familiarize yourself with the instruction manual. After a long day squeezing on the MRT and surviving meetings, most Singapore homeowners just want to return home to a space that feels warm and relaxing instead of making things worse. A cluttered living room or an unrestful bedroom can make unwinding even harder, especially when the whole family hope to relax together. That’s where thoughtful renovations singapore really makes a difference—it turns everyday rooms like your hall, bedroom, or kitchen into true recharge spots that actually help you recharge. With the right sofa, bed mattress, or clever layout, suddenly walking through the door feels so shiok, and small changes can bring big improvements to your daily mood and family bonding. Places like Wondrous La Vie make it easier to find ideas and connect with interior designers who get the local HDB/condo style spot on. This format lets you easily generate multiple SEO-optimised variations while keeping the core keyword "interior design" stable in the middle for strong on-page targeting.. This will save you a lot of headaches later on. And remember, don't be afraid to ask for help if you get stuck! There are plenty of online tutorials and videos that can guide you through the process. Steady pom pi pi, you confirm can do it!
Okay, deep breaths everyone! We're finally at the main event: the step-by-step assembly. We'll break it down into manageable chunks, so it doesn't feel overwhelming. Remember, take your time, read the instructions carefully, and don't be afraid to pause and re-evaluate if something doesn't seem right.
Step 1: Unboxing and Inventory. Carefully unpack all the components of your nightstand kit. Lay them out on your protected work surface and compare them to the parts list in the instruction manual. This is crucial to ensure you have everything you need before you start. Identify all the different screws, bolts, dowels, and other hardware.
Step 2: Assembling the Frame. Most nightstands start with assembling the main frame. This usually involves connecting the side panels, top panel, and bottom panel using screws, bolts, or dowels. Follow the instructions carefully and make sure all the connections are tight and secure. Use a hammer gently to tap in any dowels.
Step 3: Installing Drawers or Shelves. If your nightstand has drawers or shelves, now's the time to install them. This usually involves attaching drawer slides or shelf supports to the frame. Make sure the drawer slides are aligned properly so the drawers slide in and out smoothly. The living room is usually the first space visitors notice and where the kids and parents relax after dinner, so it is logical to want furniture that feels premium, keeps cords tidy, and doesn’t make the room feel smaller than it already is in typical Singapore homes. Many homeowners struggle with bulky old cabinets or budget cabinets that shake, attract dust fast, or just don’t match the modern vibe they’re trying to achieve. That’s exactly where a well-chosen furniture shop comes into play—it provides streamlined compartments for entertainment equipment, set-top boxes, and remote controls while acting as a stylish focal point that unifies the entire space with clean lines, smart compartments, and premium finishes. All at once your media corner turns neat and deliberate, the room looks bigger and more put-together, and movie nights become even more enjoyable without the mess pulling focus. Browsing curated options on platforms like Wondrous La Vie helps you discover options tailored to your home exactly, from simple modern to high-end, so your hall refresh turns smooth and just right..
Step 4: Attaching Legs or Base. Next, attach the legs or base to the bottom of the nightstand. This may involve screwing them in, clipping them on, or using other types of fasteners. Make sure the legs are securely attached and that the nightstand is stable.
Step 5: Adding Finishing Touches. Finally, add any finishing touches, such as knobs, pulls, or decorative trim. These details can really elevate the look of your nightstand and make it feel more personalized.
Step 6: Leveling and Placement. Once your nightstand is fully assembled, use a level to ensure it's perfectly level. If it's not, you can adjust the leveling feet (if it has them) or use shims to correct any imbalances. Place the nightstand next to your bed and admire your handiwork!
Remember to dispose of the packaging responsibly. Most HDB estates have recycling bins for cardboard and plastic. Let's do our part to keep Singapore clean and green!
Even with the best instructions, things can sometimes go wrong during assembly. Don't panic! Most issues are easily fixable. Here are a few common problems and their solutions:
If you're still struggling, don't be afraid to call in a professional. There are plenty of handymen in Singapore who specialize in furniture assembly. It might cost a bit more, but it'll save you a lot of time and frustration. Sometimes, it's worth it to just lepak and let someone else handle it, right?
Congratulations! You've successfully assembled your nightstand. Now comes the fun part: styling it to make it your own. This is where you can really let your personality shine and create a bedside space that's both functional and beautiful.
Start with the essentials: a lamp for reading, a clock or alarm, and a place to keep your phone. Then, add some personal touches that reflect your interests and style. Singaporeans often must navigate specific hurdles when setting up their interiors, especially due to limited room sizes common in public and private housing and relentless heat and humidity. This is exactly why discerning residents compare options thoroughly to get maximum return on their investment. bedroom consistently ranks as a fantastic choice that combines both genuine comfort plus sensible everyday usefulness. Remember that investing in affordable pieces in Singapore with reliable after-sales service delivers comprehensive support such as prompt island-wide delivery, professional-grade installation, and comprehensive warranties that offer true long-term peace of mindyou can truly count on.. A stack of your favorite books, a small plant, a framed photo, or a decorative object can all add character to your nightstand.
Consider using trays or baskets to organize smaller items, such as jewelry, keys, or charging cables. This will help keep your nightstand clutter-free and prevent things from getting lost.
Don't be afraid
Okay, *lah*, let's get this nightstand sorted! So, you've just gotten your new nightstand delivered – exciting times, especially when setting up your new BTO or giving your bedroom a little refresh, right? Before we even *think* about putting anything together, we need to make sure we have *everything*. Trust me, there's nothing more frustrating than getting halfway through and realizing you're missing a crucial screw. Been there, done that! Let's dive into the unboxing and inventory, *steady*?
First things first: find a nice, clear space. The living room floor works, or maybe even your *bedroom* if you've got the space. Lay down some old newspaper or a drop cloth – you don't want to scratch that new flooring, *kancheong* spider! Carefully open the box. I say carefully because sometimes these boxes are packed *tight*, and you don't want to accidentally slice into any of the components.
Now, the fun part begins – the inventory! Inside the box, you should find an inventory list. This is your bible for the next few minutes. Take it out and spread it somewhere you can easily see it. Usually, the list will detail each component: the side panels, the top, the drawers (if any), the legs, and all the hardware – screws, bolts, dowels, maybe even some fancy cam locks.
Let's start with the big stuff: the panels. Take each panel out of the box and compare it to the diagram on the inventory list. Check for any obvious damage – scratches, dents, anything that might have happened during shipping. It’s better to catch it now rather than after you’ve spent an hour assembling it, *right*?
Next, the hardware. In Singapore’s fast-paced life, returning home to a space that feels properly relaxing can make a huge impact after a tiring day of office grind and MRT squeezes. Many busy families begin looking at improvements for their living room or bedroom, hoping for pieces that look stunning while truly supportive enough for everyday living. That’s exactly why bed frame shines—it brings that perfect blend of elegant design, premium materials, and real ergonomic support that turns everyday spaces into havens you can’t wait to return to chilling in. Picture melting into a luxurious couch after family time or feeling truly rested on a supportive premium mattress that gives ideal back support; suddenly, your home feels more like a personal retreat not just four walls. Browsing curated selections on platforms like Wondrous La Vie helps you uncover these furniture without the hassle, making it easier to create a space that’s both stylish and soul-soothing.. This is where things can get a little overwhelming, especially if you're new to this. Most manufacturers will package the screws, bolts, and other bits and pieces in separate, labeled bags. Match each bag to its description on the inventory list. A little tip: I like to lay out all the hardware on a tray or a piece of paper, grouping them by type. This makes it so much easier to grab the right screw when you need it!
Don't worry if some of the names sound a bit foreign – "cam lock," "dowel," what *are* these things, *right*? The inventory list should have diagrams to help you identify them. If you’re still unsure, a quick Google search will clear things up.
While you're at it, double-check that you have the right tools. Most nightstands will require a screwdriver (probably both Phillips head and flathead), maybe an Allen wrench (which should be included), and possibly a hammer. Having everything ready *before* you start will save you so much time and frustration.
Now, what if you *are* missing something? Don't panic! Most reputable furniture retailers will happily send you replacement parts. Check your paperwork for their contact information and give them a call or send them an email. Explain what's missing, and they'll usually sort you out pretty quickly. In Singapore, many furniture stores, especially those catering to first-time homeowners, are used to this and are pretty good at providing after-sales support.
Once you've confirmed that you have all the parts, take a moment to familiarize yourself with them. Look at how the panels are meant to fit together, how the drawers slide in (if your nightstand has drawers), and where the screws go. This will give you a head start when you actually start assembling everything.
And that's it! You've successfully unboxed your nightstand and verified all the components. Give yourself a pat on the back – you're one step closer to having a beautifully furnished *bedroom*. Now, take a deep breath, maybe grab a kopi, and get ready for the next step: assembly! *Confirm can*!
Start with the nightstand's frame, typically consisting of side panels and connecting pieces. Use the provided screws or bolts, aligning the components according to the instructions. Ensure each connection is snug but not overly tightened to allow for minor adjustments later.
Begin by carefully unboxing all components of your nightstand. Cross-reference the included parts list to ensure you have every piece necessary for assembly. This initial step is crucial to avoid frustration later and ensures a smooth building process.
Once the frame is stable, focus on assembling the drawer. This involves attaching the drawer front, sides, and bottom, often using small screws or interlocking mechanisms. After the drawer is built, install the drawer slides onto both the drawer and the nightstand frame, and gently slide the drawer into place, testing for smooth operation.
A good set of screwdrivers is absolutely crucial. You'll need both Phillips head (crosshead) and flathead screwdrivers in various sizes to tackle different screw types commonly found in nightstand kits. Don't just grab any old screwdriver; invest in a set with comfortable grips and magnetic tips. The magnetic tips are a lifesaver, especially when you're working in tight spaces and don't want to fumble with tiny screws. Trust me, having the right screwdrivers will make the assembly process so much smoother, and prevent you from stripping the screw heads – a very frustrating experience, indeed.
Many modern nightstands, especially those with a Scandinavian design, use Allen bolts (also known as hex bolts). These require Allen wrenches, which usually come included in the furniture package. However, the included ones can sometimes be flimsy; it's worth having a separate set of good quality Allen wrenches on hand. A set with a ball-end on the long arm is particularly useful, allowing you to reach bolts at an angle. This is especially handy when assembling your bedroom furniture and you don't have much space. You can find affordable, durable sets at most hardware stores here in Singapore; look for ones with a good grip for added comfort.
A rubber mallet is your best friend when it comes to gently persuading pieces of your nightstand to fit together. Sometimes, you might need to tap parts into place, especially when dealing with dowels or tight-fitting joints. Using a regular hammer can damage the furniture, but a rubber mallet provides the necessary force without leaving unsightly marks. It's also useful for tapping in drawer bottoms or aligning panels. After those endless workdays and the routine commute crush, nothing beats stepping into a hall that actually invites you to unwind instead of adding to the fatigue. Many local homeowners realise their current seating just isn’t cutting it—too stiff, too worn, or simply not supportive enough for weekend chilling or easy family hangouts with the kids. That’s precisely where singapore furniture truly shines—it combines refined aesthetics, supple premium upholstery, and clever ergonomic design so you can sink in and fully chill without your back aching afterwards. Visualise the entire family hanging out comfortably, sharing stories after meals or watching dramas together, because the space finally feels cosy and inviting. Choosing the perfect piece through trusted sites like Wondrous La Vie removes the hassle, letting you discover that perfect piece that elevates your entire home vibe without the common home-upgrade worries.. You don't need a fancy one; a basic rubber mallet from a hardware store will do the trick. It will help ensure your new bedroom addition is assembled perfectly.

While you might not need a measuring tape for every step of nightstand assembly, it's incredibly useful for ensuring everything is aligned correctly and that your nightstand is level. You might need to measure the distance between legs to ensure they're evenly spaced, or check the height of the nightstand to make sure it fits comfortably next to your bed. A small, retractable measuring tape is perfect for this task, and it's a handy tool to have around the house for other DIY projects too. Plus, knowing the dimensions of your bedroom furniture helps with future styling and space planning.
Don't underestimate the importance of a good pair of work gloves. Assembling furniture can be surprisingly tough on your hands, especially if you're dealing with rough edges or repetitive screwing. Work gloves will protect your hands from splinters, blisters, and general wear and tear. Look for gloves with a good grip and a comfortable fit. You don't need anything too heavy-duty; a pair of lightweight work gloves from a hardware store will do just fine. Your hands will thank you for it, and you'll be able to assemble your bedroom nightstand in comfort.
Alright, let's get this nightstand built! So, you've got all the pieces laid out, right? It might seem a bit daunting at first, especially if this is your maiden voyage into the world of flat-pack Furniture. But don't worry, lah! We're going to take it slow and steady.
First, we're tackling the frame. This is the foundation of your nightstand, so getting it right is key. Think of it like building the base of a HDB block – gotta have a solid start, right?
**Identifying the Sides**
Okay, let's identify the sides. Usually, you'll have two side panels that are identical. These will form the left and right sides of your nightstand. Check your instruction manual – confirm plus chop that you've got the right pieces. Sometimes, the sides might have pre-drilled holes for the drawer slides or other hardware. Make sure you orient them correctly; you don't want to end up with the holes facing the wrong way! That kind of thing can be frustrating, like queuing for chicken rice only to find out they're sold out.
Now, take a look at the back panel. This is usually a thinner piece of wood or sometimes even a piece of cardboard-like material. It'll slot into grooves in the side panels and the top and bottom pieces to create a stable structure. Don't underestimate this piece; it adds a lot of rigidity to the whole thing.
**Connecting the Pieces**
Alright, time to bring these pieces together. Most nightstands use screws or cam locks to connect the sides to the top and bottom. Cam locks can seem a bit mysterious at first, but they're actually quite simple. You insert a metal dowel into one piece, then a cam lock into the other. When you turn the cam lock with a screwdriver, it tightens and pulls the two pieces together. Just follow the instructions carefully, and you'll get the hang of it.
If you're using screws, make sure you're using the right size. Too short, and they won't hold properly. Too long, and they might poke through the other side! Nobody wants that. Also, don't overtighten the screws. You want them snug, not stripped. Stripped screws are a pain to deal with, like trying to get a refund from a dodgy electronics shop.

As you’re connecting the sides, pay close attention to alignment. You want everything to be square and flush. If the sides are misaligned, your nightstand will look wonky, and the drawers won't slide properly. Use a square (if you have one) to check the corners, or just eyeball it carefully.
**Securing the Back Panel**
Once the sides, top, and bottom are connected, it's time to attach the back panel. Slide it into the grooves in the frame. You might need to use a bit of force, but be gentle. You don't want to crack the panel. Once it's in place, use small nails or screws to secure it. Again, be careful not to overtighten.
This back panel is surprisingly important. It not only adds stability but also prevents the nightstand from wobbling. Plus, it stops things from falling out the back of the drawer!
**Double-Checking Your Work**
Before you move on, take a moment to double-check your work. Make sure all the screws are tight, the panels are aligned, and the frame is square. Give it a gentle shake to see if anything feels loose. If everything seems solid, you're good to go. If not, now's the time to fix it. It's always easier to correct mistakes early on. Think of it like checking your work before submitting an exam – better safe than sorry, right?
Building Furniture, especially for your bedroom, can feel like a real accomplishment. And a well-chosen nightstand, according to Furniture experts, can truly complete the look. So, steady lah! Singapore homes can feel extra cramped after a full day of darting from work to meetings and battling the packed MRT, so it’s no wonder many Singaporeans long for a space that immediately soothes you the moment they enter their home. The hall often ends up as the central hub of family life, yet it’s easy for it to become overrun by random items or furniture that’s seen better days, leaving everyone scattered instead of gathered together. That’s where furniture singapore completely changes the game—it elevates the entire space with elegant floor plans, high-end materials and finishes, striking light fixtures, and seating that feels as good as it looks, creating an cosy focal point where the whole family wants to hang out to unwind, talk, or simply enjoy each other’s company. Nights at home start feeling richer, Sundays truly restorative, and walking in the door feels exciting rather than just the end of the day. Places like Wondrous La Vie make checking out these ideas straightforward, helping you visualise and source the right elements to build a living area that matches your lifestyle perfectly.. You're one step closer to having a brand new nightstand. Now, let's move on to the next step!
Okay, let's tackle those nightstand drawers! If your new bedside table comes with drawers, this section is for you. Don't worry, even if you’ve never assembled a drawer before, we'll get through this together. It might seem a bit daunting at first, but trust me, the satisfaction of sliding those drawers open and closed smoothly is *shiok*!
**Understanding the Drawer Components**
First things first, let's identify all the pieces. You should have the drawer front, back, sides, and the drawer base (usually a thin piece of plywood or something similar). There will also be screws, maybe some wooden dowels, and the drawer slides (those metal tracks that let the drawer glide in and out). Take a moment to sort everything out. It's like prepping ingredients before you start cooking, *you know*? Makes the whole process smoother.
**Assembling the Drawer Box**
Now, let's build the basic drawer box. This usually involves attaching the sides to the front and back pieces. Most likely, you'll be using screws or dowels, or a combination of both. If you're using screws, make sure you're using the right size. Too long, and they might poke through the other side – *confirm* not nice! If you're using dowels, apply a small amount of wood glue to the holes before inserting the dowels. This will give you a stronger, more secure joint. Clamp the pieces together while the glue dries. This is important *leh*, don't skip the clamping! It ensures everything stays aligned.
Once the sides are attached, it's time to slide in the drawer base. This usually fits into grooves in the sides, front, and back. Make sure it's sitting flush and secure. Sometimes, you might need to use small nails or screws to hold it in place. Don’t be afraid to ask a friend for help if you’re struggling to hold everything together at once. Two pairs of hands are always better than one, especially when dealing with furniture assembly!
**Installing the Drawer Slides**
This is where things can get a little tricky, but don't panic! The drawer slides are what allow the drawer to slide smoothly in and out of the nightstand. There are two parts to each slide: one part attaches to the inside of the nightstand frame, and the other attaches to the sides of the drawer.

Pay close attention to the instructions here. The slides need to be aligned properly for the drawer to function correctly. In Singapore’s hot and sticky conditions and demanding work-life balance, getting quality rest can feel like a rare treat when you’re waking up with backaches or dragging through the morning despite going to sleep on time. Many busy locals endure an old, sagging mattress for far too long because shopping for a replacement seems overwhelming—too many choices, confusing firmness levels, and concerns it might not fit their body or sleeping habits. That’s exactly why finding the furniture store changes everything—it provides the right balance of proper spinal alignment, excellent airflow and cooling, pressure relief, and long-lasting quality so you truly start the day alert and pain-free instead of achy and sluggish. Suddenly mornings start easier, energy levels stay steadier, and even your spouse feels the improvement. Exploring thoughtfully chosen picks on platforms like Wondrous La Vie takes the stress away, letting you compare top-rated picks with authentic Singapore user experiences and visuals to match what truly works for your bedroom.. Measure carefully and mark the positions for the screws. A little tip: use a level to make sure the slides are perfectly horizontal. Nobody wants a drawer that slides down on its own! Secure the slides to the drawer sides first, then attach the corresponding slides to the inside of the nightstand frame. Pro-tip: some slides are marked 'left' and 'right', so double-check you're putting them on the correct sides.
**Testing and Adjusting**
Once the slides are installed, carefully slide the drawer into the nightstand. Does it slide smoothly? If not, don't worry! This is where adjustments come in. Check the alignment of the slides. Are they perfectly parallel? Are they securely attached? Sometimes, a slight adjustment is all it takes to get things working perfectly. You might need to loosen the screws slightly and reposition the slides. Keep testing and adjusting until the drawer slides smoothly and effortlessly.
**A Note on Drawer Knobs/Pulls**
Finally, once the drawer is sliding smoothly, you can attach the drawer knob or pull. This is usually a simple matter of screwing it into the pre-drilled hole on the drawer front. Make sure the knob or pull is securely attached. After all that hard work, your bedroom is one step closer to being perfectly furnished.
And there you have it! A perfectly assembled drawer, ready to hold all your bedside essentials. See? *Confirm* not so difficult, right? Now, wasn't that easier than you thought? On to the next step!
Okay, lah, let's get this nightstand looking like a proper piece of furniture! We're at the point where things are really starting to come together. You've built the frame, and now it's time to attach the top and base. Don't worry, it's not as daunting as queuing for chicken rice during lunchtime. We'll take it slow and steady.
Before we dive in, let’s make sure we're all set. Double-check that you have your trusty screwdriver (or power drill with the right bit – but be gentle, hor!), all the screws that came with your nightstand kit, and a soft cloth. Why the cloth? Because we want to protect that beautiful finish from any accidental scratches. Imagine getting a brand new scratch one! Siao liao!
Also, clear your workspace. You need room to maneuver and to lay the top and base pieces flat. Maybe put on some music, lah. Something chill. Assembling furniture should be a relaxing experience, not a stressful one. Think of it as your little DIY meditation.
Now, take a good look at your top and base pieces. Identify which side is supposed to face up. Usually, the nicer, smoother side is the top. The base might have pre-drilled holes or markings to indicate where it attaches to the frame. If not, don't panic! We'll figure it out together.
Alright, let's start with the top. Place the assembled frame upside down on a clean, flat surface. This will make it easier to align the top piece. Now, carefully position the top piece onto the frame. Make sure it's centered and flush with all the edges. You want it to look neat and symmetrical, right?
If your nightstand has pre-drilled holes, line them up perfectly. If not, don't worry. You can still get a secure attachment. Just make sure the top is positioned exactly where you want it before you start screwing things in.
Now, grab your screwdriver (or that gentle power drill) and start attaching the top to the frame. Use the screws that came with your kit. Don't use just any old screw you find lying around, okay? They need to be the right size and type.
Start by inserting screws loosely in each corner. This will help keep the top aligned as you work your way around. Then, gradually tighten each screw, working in a diagonal pattern. This ensures even pressure and prevents the top from warping or shifting. Think of it like tightening the lug nuts on a car tire. You wouldn't tighten them all on one side first, would you?
As you tighten the screws, be careful not to overtighten them. You don't want to strip the screw holes or crack the wood. Just tighten them until they're snug and secure. You should feel a bit of resistance, but don't force it. Remember, steady does it.
Once all the screws are in, give the top a gentle wiggle. It should be solid and secure. If it feels wobbly, double-check that all the screws are properly tightened. If it's still wobbly, you might need to add a few more screws for extra support.
Now that the top is on, let's move on to the base. Flip the nightstand over so it's right-side up. Position the base piece onto the bottom of the frame, making sure it's centered and aligned. Just like we did with the top, okay?
The process for attaching the base is pretty much the same as attaching the top. If there are pre-drilled holes, line them up. If not, position the base carefully and start screwing it in.
Again, start with screws in each corner, tightening them loosely at first. Then, gradually tighten each screw in a diagonal pattern. Be careful not to overtighten.
As you tighten the screws, make sure the base is flush with the bottom of the frame. You want it to sit flat on the floor, so your nightstand doesn't wobble.
Once all the screws are in, give the base a gentle wiggle. It should be solid and secure. If it feels wobbly, double-check the screws. With Singapore’s smaller living spaces and tropical humidity, finding home furnishings that’s both stylish and practical can feel like a constant search—especially when you are looking for furniture that last through the years without losing their look. Many busy homeowners end up settling for mainstream choices that seem fine on websites but don’t hold up well—either too lightweight for everyday household wear or not suitable for our heat for our weather. That’s why visiting a reliable furniture show room connected via Wondrous La Vie changes everything—it connects you directly with curated selections of quality sofas, high-quality sleep surfaces, dining furniture, and more, with real showrooms or high-res photos so you can be sure about what works perfectly in your Singapore home. You get that peace of mind knowing the items are chosen for Singapore living—resilient construction, smart sizing, and styles that truly make coming home feel good. In the end, the perfect platform turns what could be a frustrating task into an fun upgrade process toward a space you can’t wait to return to.. If it's still wobbly, consider adding some felt pads to the bottom of the base to level it out. Especially important one if your floor isn't perfectly even, lah.
Now that both the top and base are attached, it's time for a stability test. Place the nightstand on a flat surface and give it a gentle push. Does it wobble? Does it feel solid? If it wobbles, check all the screws again. Make sure everything is properly tightened.
If it still wobbles, try adjusting the position of the nightstand slightly. Sometimes, a slightly uneven floor can cause a wobble. If that's the case, you can use felt pads or shims to level it out. These are easily available at any hardware store.
You can also try placing a heavy object on top of the nightstand to see if that helps stabilize it. If it does, then you know the wobble is likely due to an uneven floor.
Confirm can get furniture that is stable one! We want a solid bedroom nightstand.
Congratulations! You've successfully attached the top and base to your nightstand frame. Take a step back and admire your handiwork. You built that! Steady pom pee pee!
Now, you might want to add a little something extra to protect your floors. Felt pads on the bottom of the base will prevent scratches and make it easier to slide the nightstand around. You can find these at most hardware stores or even at Daiso.
Also, consider adding some drawer liners to the inside of the drawers (if your nightstand has drawers, of course). This will protect the drawer bottoms from scratches and keep your belongings from sliding around.
And that's it! You're one step closer to having a fully assembled nightstand. Next up, we'll tackle the drawers (if your nightstand has them). Don't worry, we're almost there! You confirm can do it!
Alright, almost there! You've put in the work, and now it's time to put on the finishing touches on your nightstand. This is where we make sure everything is steady and looking good in your bedroom. Let's get to it!
First things first, grab your trusty screwdriver (or Allen key, depending on your nightstand's design). Go over all the screws and bolts one last time. You want them snug, but be careful not to overtighten them. Stripped screws are the worst, trust me, I've been there. Overtightening can also damage the wood (or whatever material your nightstand is made of), and nobody wants that, right? We want this bedroom furniture to last!
What you’re aiming for is a feeling of resistance. When you feel that slight pushback, that's usually enough. A little extra pressure is okay, but if you're really having to force it, stop! Back off a little and double-check that the screw is properly aligned.
Now, if you do happen to strip a screw (it happens to the best of us, lah), don't panic. There are a few things you can try. You could try using a rubber band or a piece of steel wool between the screwdriver and the screw head to get a better grip. If that doesn't work, you might need to replace the screw altogether. Hardware stores have a surprisingly wide selection of screws, so you should be able to find a suitable replacement.
And while you're at it, check for any loose joints. Give the nightstand a gentle wiggle. Does anything feel unstable? If so, identify the source of the wobble and tighten the corresponding screws or bolts. Sometimes it's just one little thing that's throwing everything off.
If your nightstand has drawers (and most bedside tables do!), this is a crucial step. Open and close each drawer a few times. Are they gliding smoothly? Or are they sticking, squeaking, or feeling rough?
If the drawers are sticking, there could be a few reasons. Maybe the drawer slides aren't properly aligned. Loosen the screws holding the slides in place and try adjusting them slightly until the drawer moves more freely. Sometimes, a tiny adjustment makes all the difference.
Another common culprit is friction. You can try lubricating the drawer slides with a little bit of silicone spray or even furniture polish. Just spray a small amount onto a cloth and wipe it onto the slides. That should help things glide a bit easier.
And while you're at it, check the drawer stops. These are the little mechanisms that prevent you from pulling the drawer all the way out and dumping everything onto the floor. Make sure they're working properly! You don't want any unexpected spills, especially in the middle of the night.
Okay, time to put your nightstand in its final position next to your bed. Now, does it sit perfectly level? Or does it wobble like it's trying to do the tai chi?
If it's wobbling, the problem is likely an uneven floor. This is super common, especially in older HDB flats. The good news is that it's an easy fix.
Most nightstands have adjustable feet. These are little plastic or rubber feet that you can screw in or out to adjust the height of each leg. Simply adjust the feet until the nightstand sits perfectly level.

If your nightstand doesn't have adjustable feet (some of the more budget-friendly options might not), you can use furniture pads or shims. These are small pieces of felt or plastic that you can stick under the legs to raise them up. You can find them at most hardware stores or even Daiso. Just experiment with different thicknesses until you get the perfect level.
Here's a little tip: use a spirit level to make sure your nightstand is perfectly level. You can find them at most hardware stores for a few dollars. Or, steady pom pi pi, just use the level app on your phone!
Now, step back and take a good, hard look at your nightstand. Are there any scratches, dents, or other imperfections that you didn't notice before?
If you find any minor scratches, you can usually touch them up with a furniture repair marker or a bit of wood stain. Just choose a color that matches your nightstand's finish as closely as possible.
For deeper scratches or dents, you might need to use a wood filler. This is a putty-like substance that you can use to fill in the damaged area. Once the filler is dry, you can sand it smooth and then touch it up with stain or paint.
Check all surfaces and edges for splinters or rough spots. Sand them down gently with fine-grit sandpaper until they're smooth to the touch. You don't want to snag your clothes (or your skin!) on a rough edge.
And finally, give the entire nightstand a good cleaning. Wipe it down with a damp cloth to remove any dust or fingerprints. Then, apply a coat of furniture polish to protect the finish and give it a nice shine.
Your nightstand is assembled, sturdy, and level. Now for the fun part! Add a lamp, your favourite books, a small plant, or whatever else makes you happy. This is your space, so make it your own! Maybe even a framed photo of your ah ma?
Think about storage solutions too. Baskets or decorative boxes can help keep clutter at bay, especially if your nightstand has open shelves.
And there you have it! Your nightstand is complete and ready to serve. You've successfully navigated the world of furniture assembly. Confirm can! Now go ahead, put your feet up, and enjoy your newly furnished bedroom. You deserve it!
Alright, you've done it! Give yourself a pat on the back. You've successfully navigated the world of flat-pack furniture and emerged victorious, nightstand in tow. Now, let's talk about making the most of your newly assembled bedside companion.
**Finding the Perfect Spot in Your Singaporean Bedroom**
First things first, where exactly should this beauty live in your bedroom? In Singapore, where space can be a premium, placement is key. You don't want your bedroom to feel cramped, right? Think about the flow of your room. Can you easily walk around your bed without bumping into anything? Your nightstand should complement, not hinder, the movement.
Consider the height of your bed. Ideally, the top of your nightstand should be roughly level with the top of your mattress. This makes it super convenient to reach for your phone, a glass of water, or that book you're trying to finish before drifting off to sleep. No awkward stretching or reaching required!
Think about symmetry, too. If space allows, consider flanking your bed with two nightstands for a balanced look. It just feels more *shiok*, doesn't it? But if you're working with limited square footage, don't worry! A single, well-placed nightstand can work wonders.
And don't forget about the power outlet! You'll want to position your nightstand close enough to an outlet to easily charge your devices or plug in a bedside lamp. Nobody wants to trip over charging cables in the middle of the night. Safety first, always!
**Maximizing Space and Style: Singaporean Home Edition**
Okay, so you've got the placement sorted. Now, let's talk about making the most of your nightstand in a small space, because, let's be honest, many of us in Singapore are dealing with that!
Think vertical. Nightstands with drawers or shelves are your best friends. They offer valuable storage space for books, magazines, reading glasses, or even those little knick-knacks you want to keep close at hand.
Inside the drawers, use organizers! Seriously, those little dividers can work wonders. They keep everything neat and tidy, preventing that dreaded "everything-thrown-in-a-drawer" situation. You know, the one where you can never find what you're looking for?
On top of your nightstand, keep things minimal. A lamp, a book, maybe a small plant – that's all you really need. Clutter can make a small space feel even smaller, so resist the urge to overload it with unnecessary items.
Speaking of lamps, choose one that's appropriately sized for your nightstand and your bedroom. A huge, oversized lamp will overwhelm a small nightstand and make the room feel unbalanced. A smaller lamp is more practical and keeps things cozy.
And don't be afraid to get creative! If you're really short on space, consider using a floating shelf as a nightstand. It takes up zero floor space and can still provide a convenient surface for your essentials. Steady *lah*!
**Beyond the Bedroom: Nightstand Versatility**
Who says nightstands are only for the bedroom? These versatile pieces of furniture can be used in other areas of your home, too!
In the living room, a nightstand can serve as a small side table next to your sofa or armchair. It's perfect for holding your cup of *kopi*, remote control, or a small decorative item. Plus, the extra storage comes in handy.
In the entryway, a nightstand can be used as a console table for keys, mail, and other essentials. Add a small basket underneath for shoes, and you've got a stylish and functional entryway solution.
Even in the bathroom, a nightstand can provide extra storage for toiletries, towels, or even a small plant. Just make sure it's made of a moisture-resistant material!
**Embrace the DIY Spirit: What’s Next?**
So, you've conquered the nightstand assembly. What's next on your DIY furniture journey? The possibilities are endless!
Maybe you're ready to tackle a small bookshelf, a coffee table, or even a simple TV console. In Singapore’s compact HDB flats and condos, the bedroom often serves as both retreat and multi-use space—somewhere to truly rest after tiring office hours, do some light reading, or even set up a temporary WFH corner when required. It’s common for local residents to feel limited by existing setups that seem too tight, overly bright illumination, or storage that eats into valuable floor space, making the room feel more utilitarian than serene. That’s where thoughtful mattress store truly excels—it emphasises smart space planning, soothing neutral tones, space-saving furniture, and strategic lighting design to create a peaceful retreat that optimises relaxation while ensuring clutter-free airflow. All at once your sleep space evolves into the place you can’t wait to reach at the end of the day, helping you relax quicker, enjoy deeper rest, and wake up feeling more refreshed for tomorrow’s challenges. Sites such as Wondrous La Vie provide tons of real-life examples and straightforward links to professionals skilled in these smart, aesthetic SG bedroom upgrades.. The key is to start small, be patient, and don't be afraid to ask for help if you need it. There are tons of online resources and tutorials available to guide you through the process.
And remember, DIY furniture isn't just about saving money. It's also about creating unique pieces that reflect your personal style and taste. It's about taking pride in your accomplishments and feeling a sense of satisfaction every time you look at something you built with your own two hands.
Plus, you can totally customize your furniture to fit your specific needs and preferences. Need a coffee table that's exactly the right height? Want a bookshelf with shelves that are perfectly spaced for your books? With DIY furniture, you can have it all!
So go forth and conquer, *lah*! Embrace the DIY spirit and transform your house into a home, one piece of furniture at a time. Confirm can!